 Skip to content

Why You Want Fighter Jet Tech in Your Daily Driver
Seeing your speed floating in midair while driving feels pretty awesome. Like something out of Top Gun, except you’re probably just heading to Target. But there’s something genuinely cool about having that info right there in your line of sight.
That’s what a heads-up display does. Speed, navigation, and other useful information, all projected where you can see it without looking away from the road. No more glancing down at the speedometer or squinting at your phone for directions.
The surprising thing? It’s actually pretty easy to install one. Not like other car mods where you’re cutting wires or taking apart half the dashboard. Most HUDs are basically plug-and-play. Still feels like fighter jet tech, though, even if your car never goes faster than the speed limit.
Picking Your HUD: From Cheap and Simple to “Holy Crap That’s Cool”
HUDs come in all sorts of flavors. Some are super basic. Others get pretty fancy.
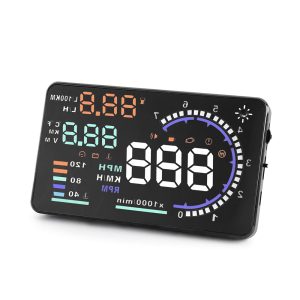
Basic OBD-II HUDs run about $30 to $100. These plug into the diagnostic port under your dash and display speed, RPM, and possibly engine temperature. Simple but effective.
A solid example is the A8 HUD Head-Up Display Speedometer, which works with most cars that support OBDII or EUOBD. It offers clean speed readouts and essential data with a plug-and-play setup—no deep tech knowledge needed.
Smartphone HUDs use an app to reflect your phone screen onto the windshield. Works okay in the right lighting, though the image isn’t always super sharp.
GPS HUD units have their own GPS built in. Good if you don’t want to mess with the OBD port or your car doesn’t have one.
High-end AR systems exist but they’re expensive and complicated. More like something you’d pay someone else to install.
For most people, a basic OBD unit does everything you actually need. Speed, maybe a few engine stats. Unless you really want fancy navigation overlays or just like having the latest gadgets, simple usually works better.
What You’ll Actually Need
Most kits come with pretty much everything. You’ll get the HUD unit itself, some kind of reflective film for the windshield, a power cable, mounting stuff, and hopefully instructions that make sense.
Might want to grab a microfiber cloth for cleaning the windshield and maybe a plastic card for smoothing out the film. Some cable clips or velcro strips help keep wires tidy, but that’s optional.
Compared to most car projects, this one’s pretty forgiving. No cutting, no soldering, no taking apart the interior. Just a few steps and some patience.
Finding the Right Spot: Where Does This Thing Go?
Placement matters more than you might think, but it’s not rocket science.
Sit in the driver’s seat and just set the unit on the dash somewhere. Don’t plug it in yet, just see where it might work. You want the projection to show up in your natural line of sight without blocking your view of the road. Usually somewhere above the steering wheel works, but every car’s different.
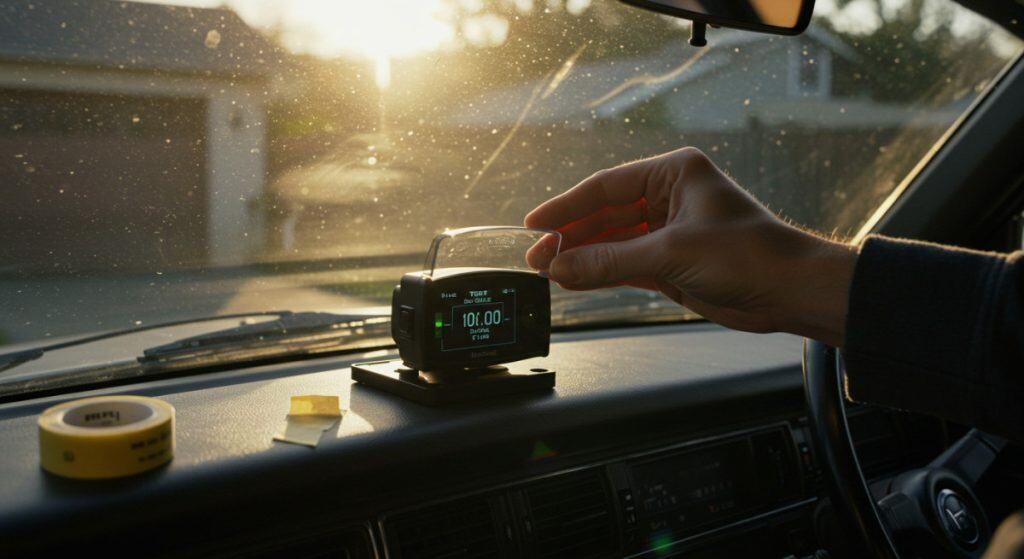
Once you find a spot that feels right, maybe mark it with some tape. Then power it on and double-check. How’s it look in bright light? What about at night? Any weird glare or reflections?
If the image looks doubled or fuzzy, don’t worry about it yet. The film usually fixes that.
The Film Thing: Sounds Scary, Actually Not That Bad
The reflective film is probably the part that makes people nervous. Sticking something to your windshield permanently? Yeah, that feels risky.
But it’s really not that complicated. Just need to be careful about it.
Clean the windshield really well first. Then peel the backing off the film, line it up where you marked, and stick it down starting from the center. Use a soft card or cloth to push out any bubbles.
The whole point is to prevent double images. Without the film, the windshield’s layered glass can create two ghosted displays that sit right next to each other. Distracting and annoying. The film fixes that.
It might not be perfect on the first try. Most kits include extras, or you can buy replacement film for a few bucks if needed.
Wiring: Simple in Theory, Messy in Practice
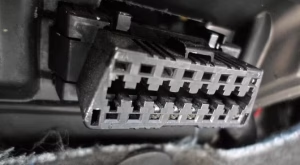
Most HUDs plug into the OBD-II port, which is usually somewhere under the dash near your left knee. Plug it in and it powers up when you start the car. Pretty straightforward.
The annoying part is making the cable look decent. Running it cleanly along trim pieces takes some fiddling around. Zip ties and little adhesive clips help, but mostly it’s just patience. Looks like a mess at first, then gradually gets better as you figure out the best route.
Some units use USB or plug into a 12V outlet instead. Works fine, but you might lose some features like automatic on/off or engine data.
Getting It Dialed In
Once everything’s installed, there’s usually some tweaking involved.
Brightness is the big one. Too dim and you can’t see it in sunlight. Too bright and it’s distracting at night. Most units adjust automatically, but manual controls help when the auto stuff doesn’t get it right.
Double images might still show up even with the film. Usually, it means the film needs to be positioned slightly differently. Small adjustments make a big difference.
Sunglasses can be weird. Polarized lenses sometimes make the display disappear or look strange. Doesn’t happen with all units or all sunglasses, but it’s a thing to be aware of.
What It’s Actually Like Living With One
Takes a few days to get used to. At first, having speed floating in front of you feels weird, maybe even distracting. But after a week or so, it just becomes normal. Stops being a novelty and starts being useful.
Passengers usually notice it and think it’s pretty cool. Not flashy or show-offy, but definitely gets some “oh that’s neat” comments.

It’s not perfect, though. Really bright sunlight can wash out the display. Some cars disconnect the OBD port briefly when you start them, so the HUD flickers. And if the dash gets dusty or the mount loosens up, the unit can shift around.
But overall, it’s one of those upgrades that actually sticks. It makes the car feel more modern without making any major changes. Even if everything else about your ride is completely stock, having that floating speedometer makes it feel just a little more special.


How do I change the speed ometer too mph. Plus l don’t have an adapter to plug it into the obd port. Need assistance please!!
Hi Tony, this depends on whether you’re trying to change it on the vehicle dash, an OEM HUD, or an aftermarket HUD. For factory systems, the mph/kmh setting is usually under Units or Display settings in the vehicle menu using the steering wheel, dash buttons, or infotainment screen.
For aftermarket HUDs, it depends on the specific model and may be changed through the HUD buttons or an app. Since you don’t have an OBD adapter, make sure the HUD you’re using supports GPS-only operation or has the correct adapter needed.