 Skip to content

Although rebuilding a rotary engine can be an exciting challenge, there’s nothing to fear if you have the proper knowledge and tools. Rotary engines, like those in Mazdas RX-7 and RX-8, radically differ from most traditional piston engines; therefore, their rebuilding requires special skills and attention to detail.
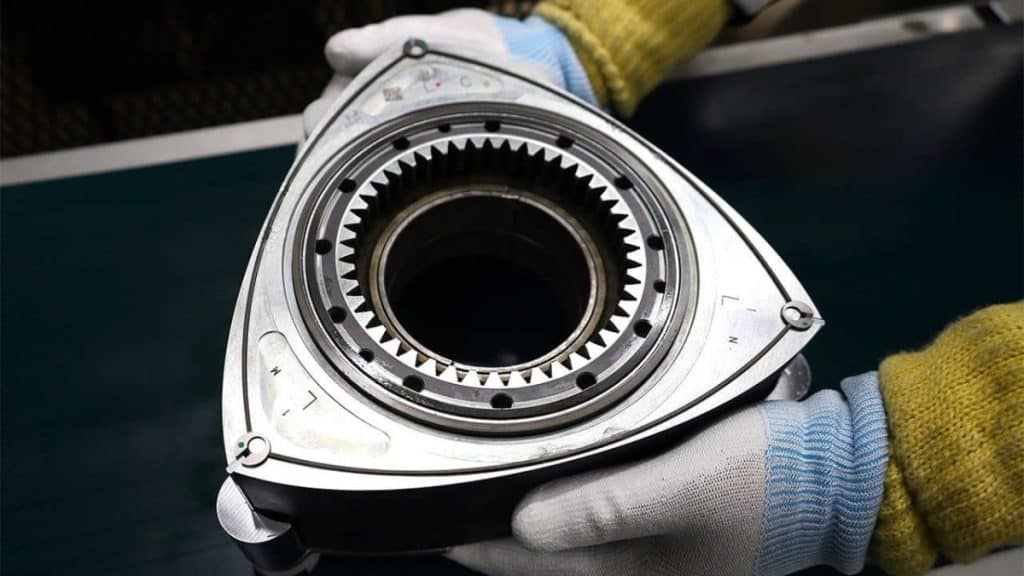
Image from Nippon.com
This guide walks you through rebuilding a rotary engine, from preparation to final testing.
Getting Ready for Rebuilding a Rotary Engine: Tools and Diagnosis
Before you get down to rebuilding a rotary engine, you will need to have the proper tools and know the major warning signs that a rebuild is in order.
Essential Tools for Rebuilding a Rotary Engine
The following are some of the primary tools needed for rebuilding a rotary engine:
- Dial indicator: Measures the wear on the rotor housing.
- Torque wrench: This ensures your bolts are tightened per specs.
- Engine stand: Used for easy disassembly and reassembly.
- Rotor housing lapping tool: Used for resurfacing if necessary.
In addition to these tools, consider using the LEXIVON .5 in. Drive Click Torque Wrench (10-150 Ft-Lb, 13.6-203.5 Nm – LX-183) for precise torque measurement. This high-quality wrench is essential for ensuring all bolts are tightened according to specifications, helping to prevent any issues during reassembly.
LEXIVON .5 in. Drive Click Torque Wrench 10-150 Ft-Lb, 13.6-203.5 Nm – LX-183

Diagnosing When It’s Time to Rebuild Your Rotary Engine
Diagnosis is very important in rebuilding a rotary engine. Below are major indicators to let you know it’s time for an engine rebuild.
- Low compression: Low compression usually means worn-out seals.
- Excessive oil consumption: Many things can cause this, but it often indicates a problem with the oil control rings.
- Smoking: White or blue smoke could mean you have internal leaks.
Do a compression test to confirm that a rebuild is needed. This will allow you to diagnose your problem before you begin correctly.
What is a Compression Test?
The compression test measures pressure or compression to determine the pressure a rotary engine’s combustion chambers, or rotor housings, generated during the compression phase of the working cycle. It is critical to engine performance because it directly affects power output, efficiency, and overall health.
Analyzing Results
- Healthy Engine: Compression readings of a healthy rotary run around 7.5-8.5 bar at 250 RPM, though this can vary from one engine model to the next. The reading for all three chambers in each rotor should be consistent. This will ideally give the same readings within 10% of one another.
- Low Compression: If readings are below 6.0 bar, there is major wear or serious damage to the seals or housings, and a rebuild may be in order.
- Uneven Compression: Large differences between chambers may mean local wear or damage to one or more apex seals or warping of one housing.
Disassembling the Rotary Engine: Step-by-Step Breakdown
Disassembling a rotary requires caution. Ensure meticulous attention to detail to ensure proper alignment during reassembling.
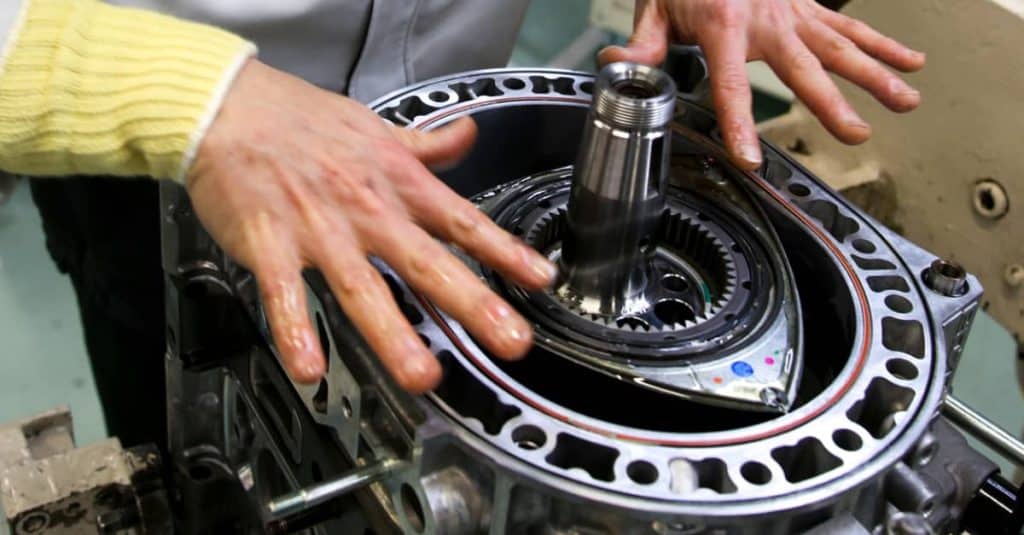
Image from mazda.com
How to Disassemble a Rotary Engine Safely
Follow these steps:
- Remove ancillary components: Intake, exhaust manifolds, and other external parts should come first.
- Disassemble the engine core: Take out the rotor housings, rotors, and the eccentric shaft.
- Label and organize: Keep all parts labeled and organized so they are easy to spot during installation.
Inspecting Parts During the Rotary Engine Disassembly
As you disassemble the engine, be sure to inspect each piece. Look carefully for:
- Rotors: Check for wear and damage.
- Rotor housings: Look for scratches, scoring, or cracks.
- Seals: Check the apex and side seals for any signs of wear.
If any component is too damaged to allow you to repair it effectively, plan on replacing it rather than risking poor performance later.
Cleaning and Machining Rotary Engine Parts
Once the engine is disassembled, it is time to clean up the parts and prepare them for reassembly.
How to Clean Rotary Engine Components Properly
Thoroughly clean all parts to remove any buildup. Use:
- Solvent-based cleaners: To dissolve oil and grease.
- Ultrasonic cleaners: Ideal for tiny, complex parts.
- Brass brushes: These are soft enough not to scratch the surface yet hard enough to scrub away carbon.
When Machining is Necessary in Rebuilding a Rotary Engine
In some cases, machining might be necessary. You may need to:
- Resurface rotor housings: Especially if they are warped or scored.
- Lap the rotors: Make sure they are flat for proper sealing.
If any parts are beyond repair, consider replacing them. Rebuilding a rotary engine with damaged parts will lead to more issues.
Reassembling a Rotary Engine: A Precise Process
After cleaning all the parts and laying them out, you are ready to reassemble the rotary engine.
Key Steps to Reassemble a Rotary Engine Correctly
Here’s how to proceed:
- Install the eccentric shaft: Make sure that it is aligned well.
- Insert the rotors: Put the rotors back into the housing. Do this gently.
- Reassemble rotor housings: All of these should fit perfectly into their places. This is to prevent problems from arising shortly.
Installing Seals and Bearings During Rebuilding a Rotary Engine
While installing seals and bearings, precision will be everything:
- Apex seals: They should move freely in their grooves.
- Side seals: Need to fit snugly without gaps.
- Bearings: Must be clean and well-lubricated before installation.
Timing the Engine During Reassembly
Correct timing is essential during reassembly. A dial indicator helps see that everything is in line. If your timing is off, your engine will either run like crap or just plain won’t at all.
Testing and Breaking In Your Rebuilt Rotary Engine
Finally, you must test and correctly break in the rotary engine once it’s together.
Essential Tests After Rebuilding a Rotary Engine
Before putting the engine back in the vehicle, perform these tests:
- Compression test: Ensures good compression in all chambers.
- Oil pressure test: Confirms the oil pump is working and there are no leaks.
- Leak-down test: Checks for air leaks around seals and gaskets.
Best Practices for Breaking In a Rebuilt Rotary Engine
To break in the rebuilt engine:
- Drive gently at first: Avoid high RPMs for the first 500-1000 miles.
- Change the oil early: Do this after the first 100 miles to remove contaminants.
- Monitor performance: Watch for unusual sounds or behaviors and address them quickly.
Final Tips for Successfully Rebuilding a Rotary Engine
Rebuilding a rotary requires preparation, precision, and patience. The steps outlined here should help you rebuild your engine to enjoy its unique performance for many miles ahead. Take your time, double-check what you are doing, and enjoy the process of bringing your rotary engine back to life.
FAQ
What makes rebuilding a rotary engine different from rebuilding a piston engine?
Rotary engines use rotors instead of pistons and have unique seals. They require specialized tools and precision, making the rebuild process more complex.
How do I know if my rotary engine needs a rebuild?
Signs include low compression, high oil consumption, smoke from the exhaust, and reduced performance. A compression test can confirm if a rebuild is needed.
What are the most critical steps in rebuilding a rotary engine?
Key steps include aligning the eccentric shaft, inserting rotors carefully, reassembling housings precisely, and ensuring proper timing.
Can I reuse old parts during the rebuild, or should I replace them?
Replace worn or damaged parts, especially seals, bearings, and housings. Reusing bad parts can lead to poor performance and another rebuild.
How can I ensure the longevity and performance of my rebuilt rotary engine?
Regular maintenance, like oil changes and monitoring compression, is crucial. Use high-quality fuel and oil designed for rotary engines.


